Apie šį buildą
BD1 "Chimera" repo
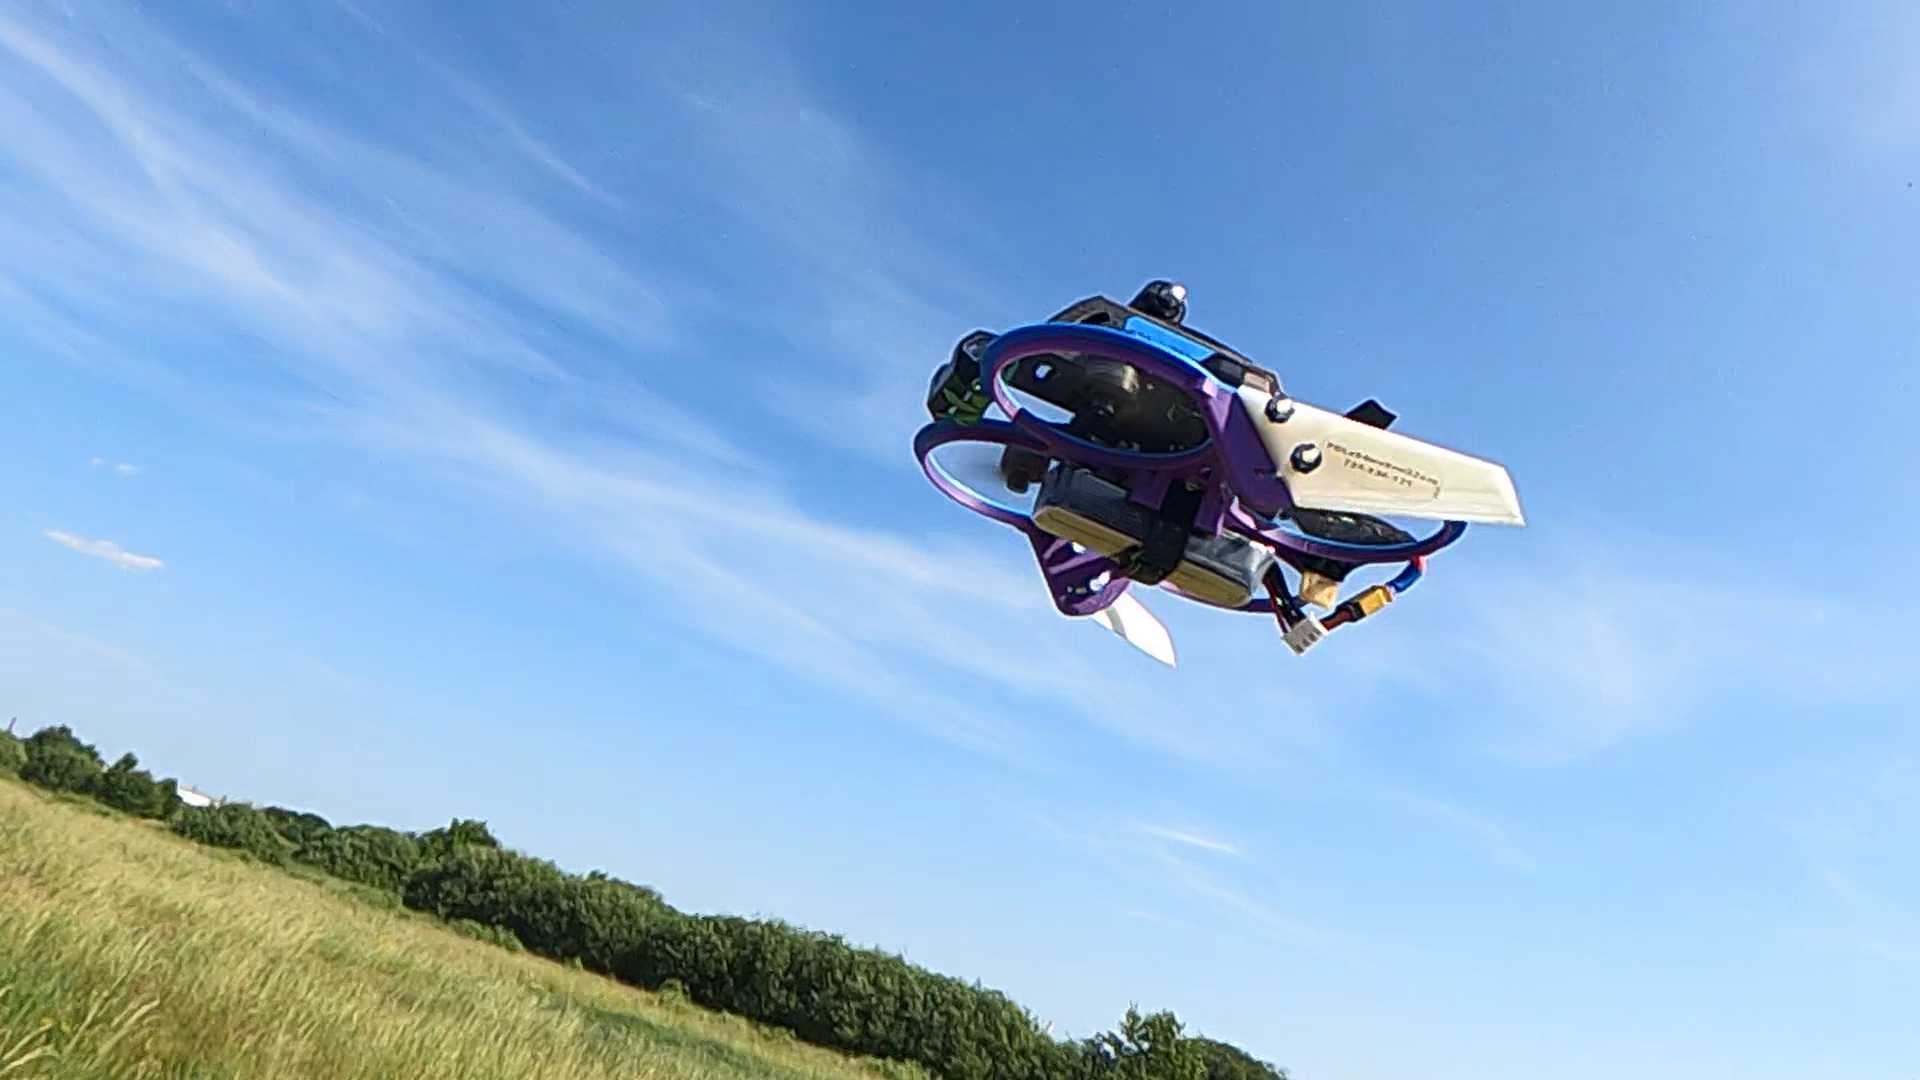
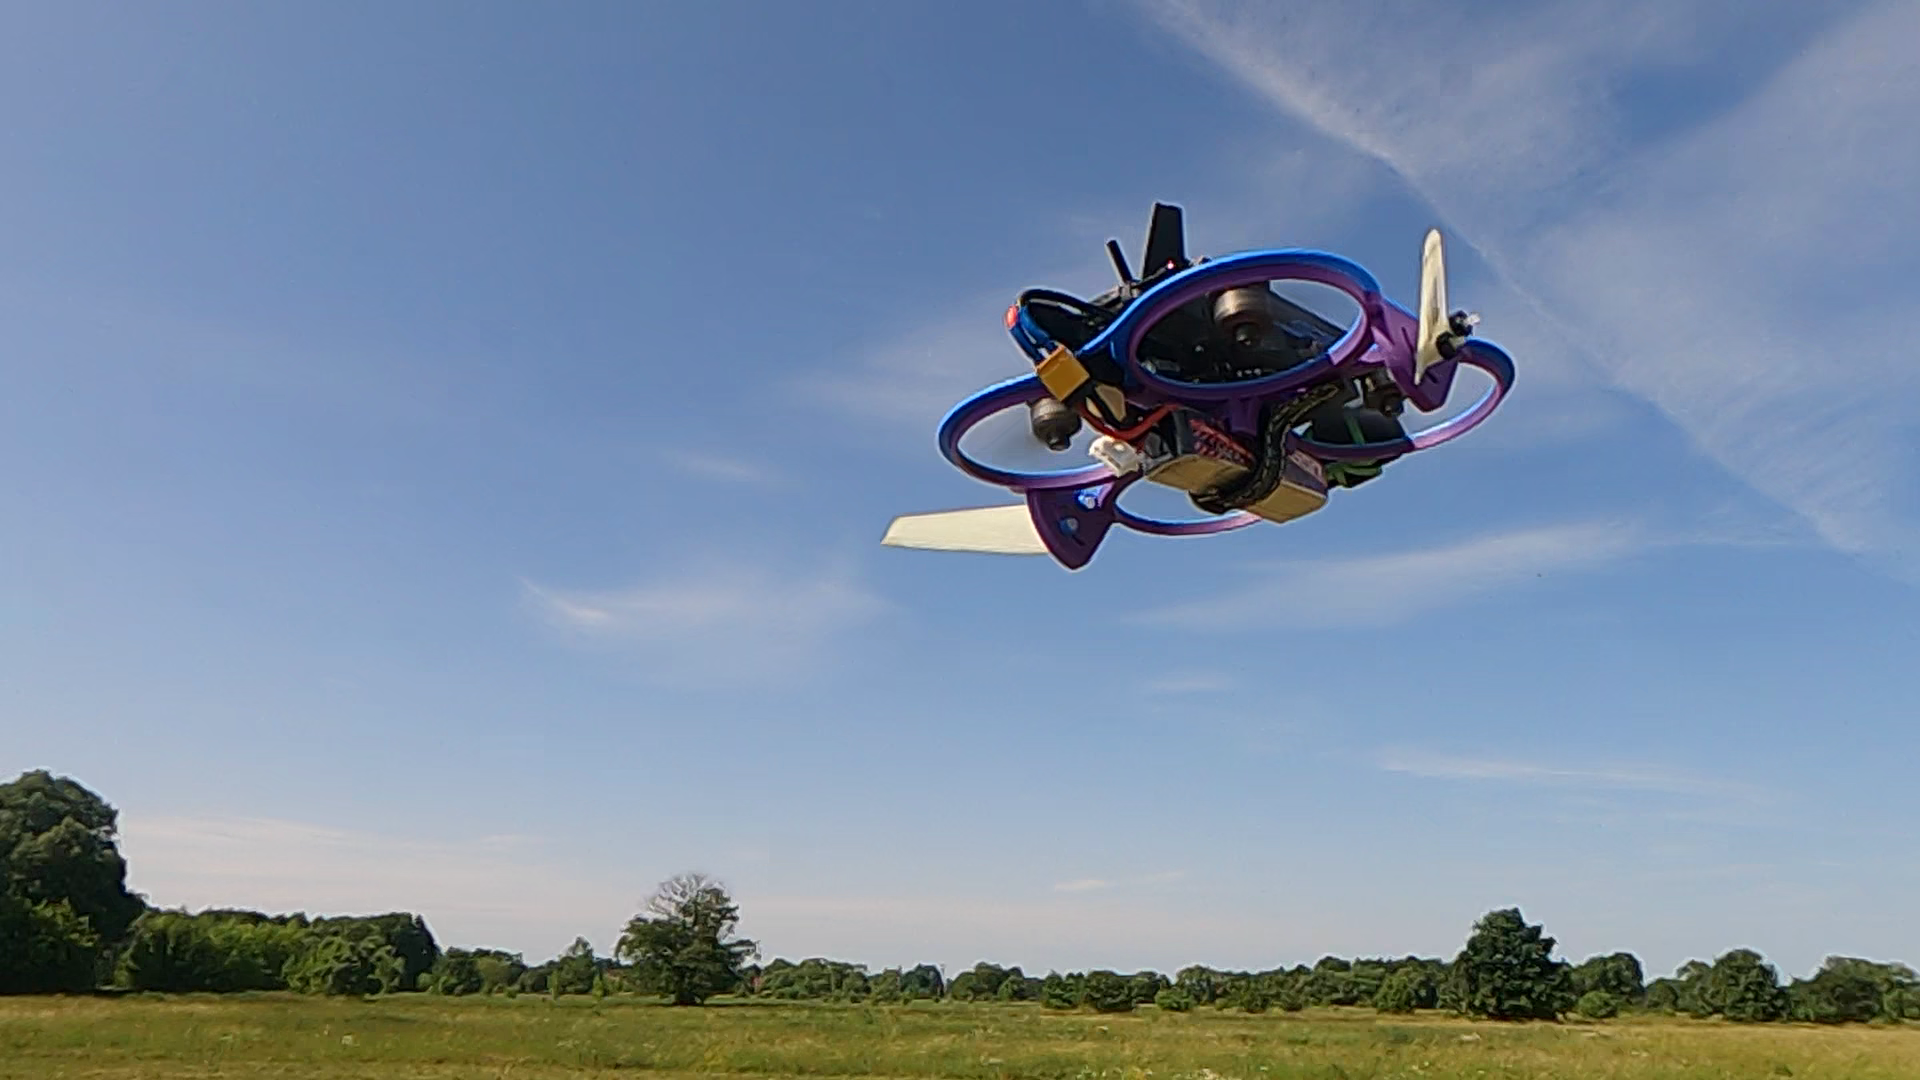
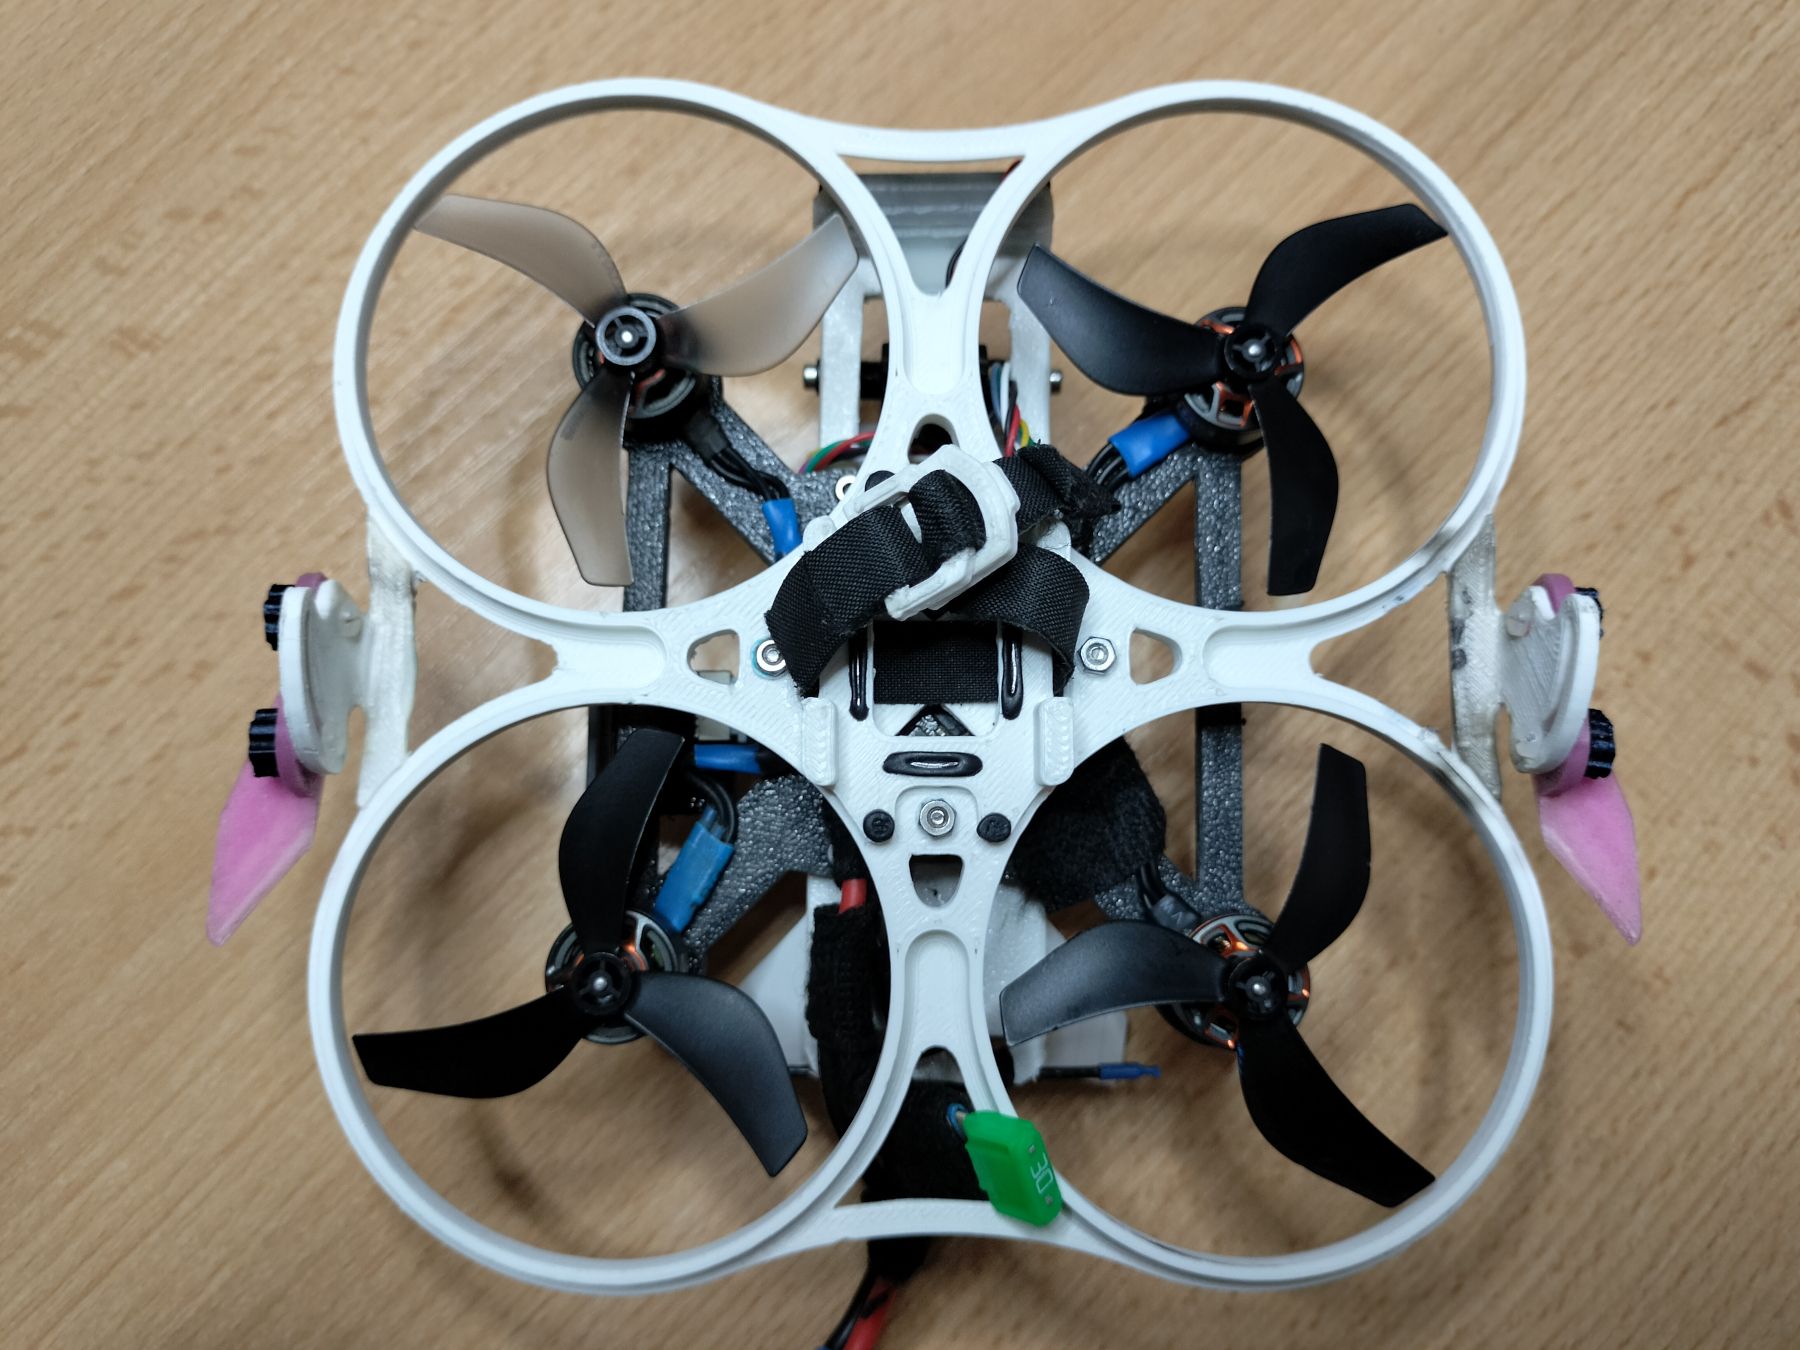
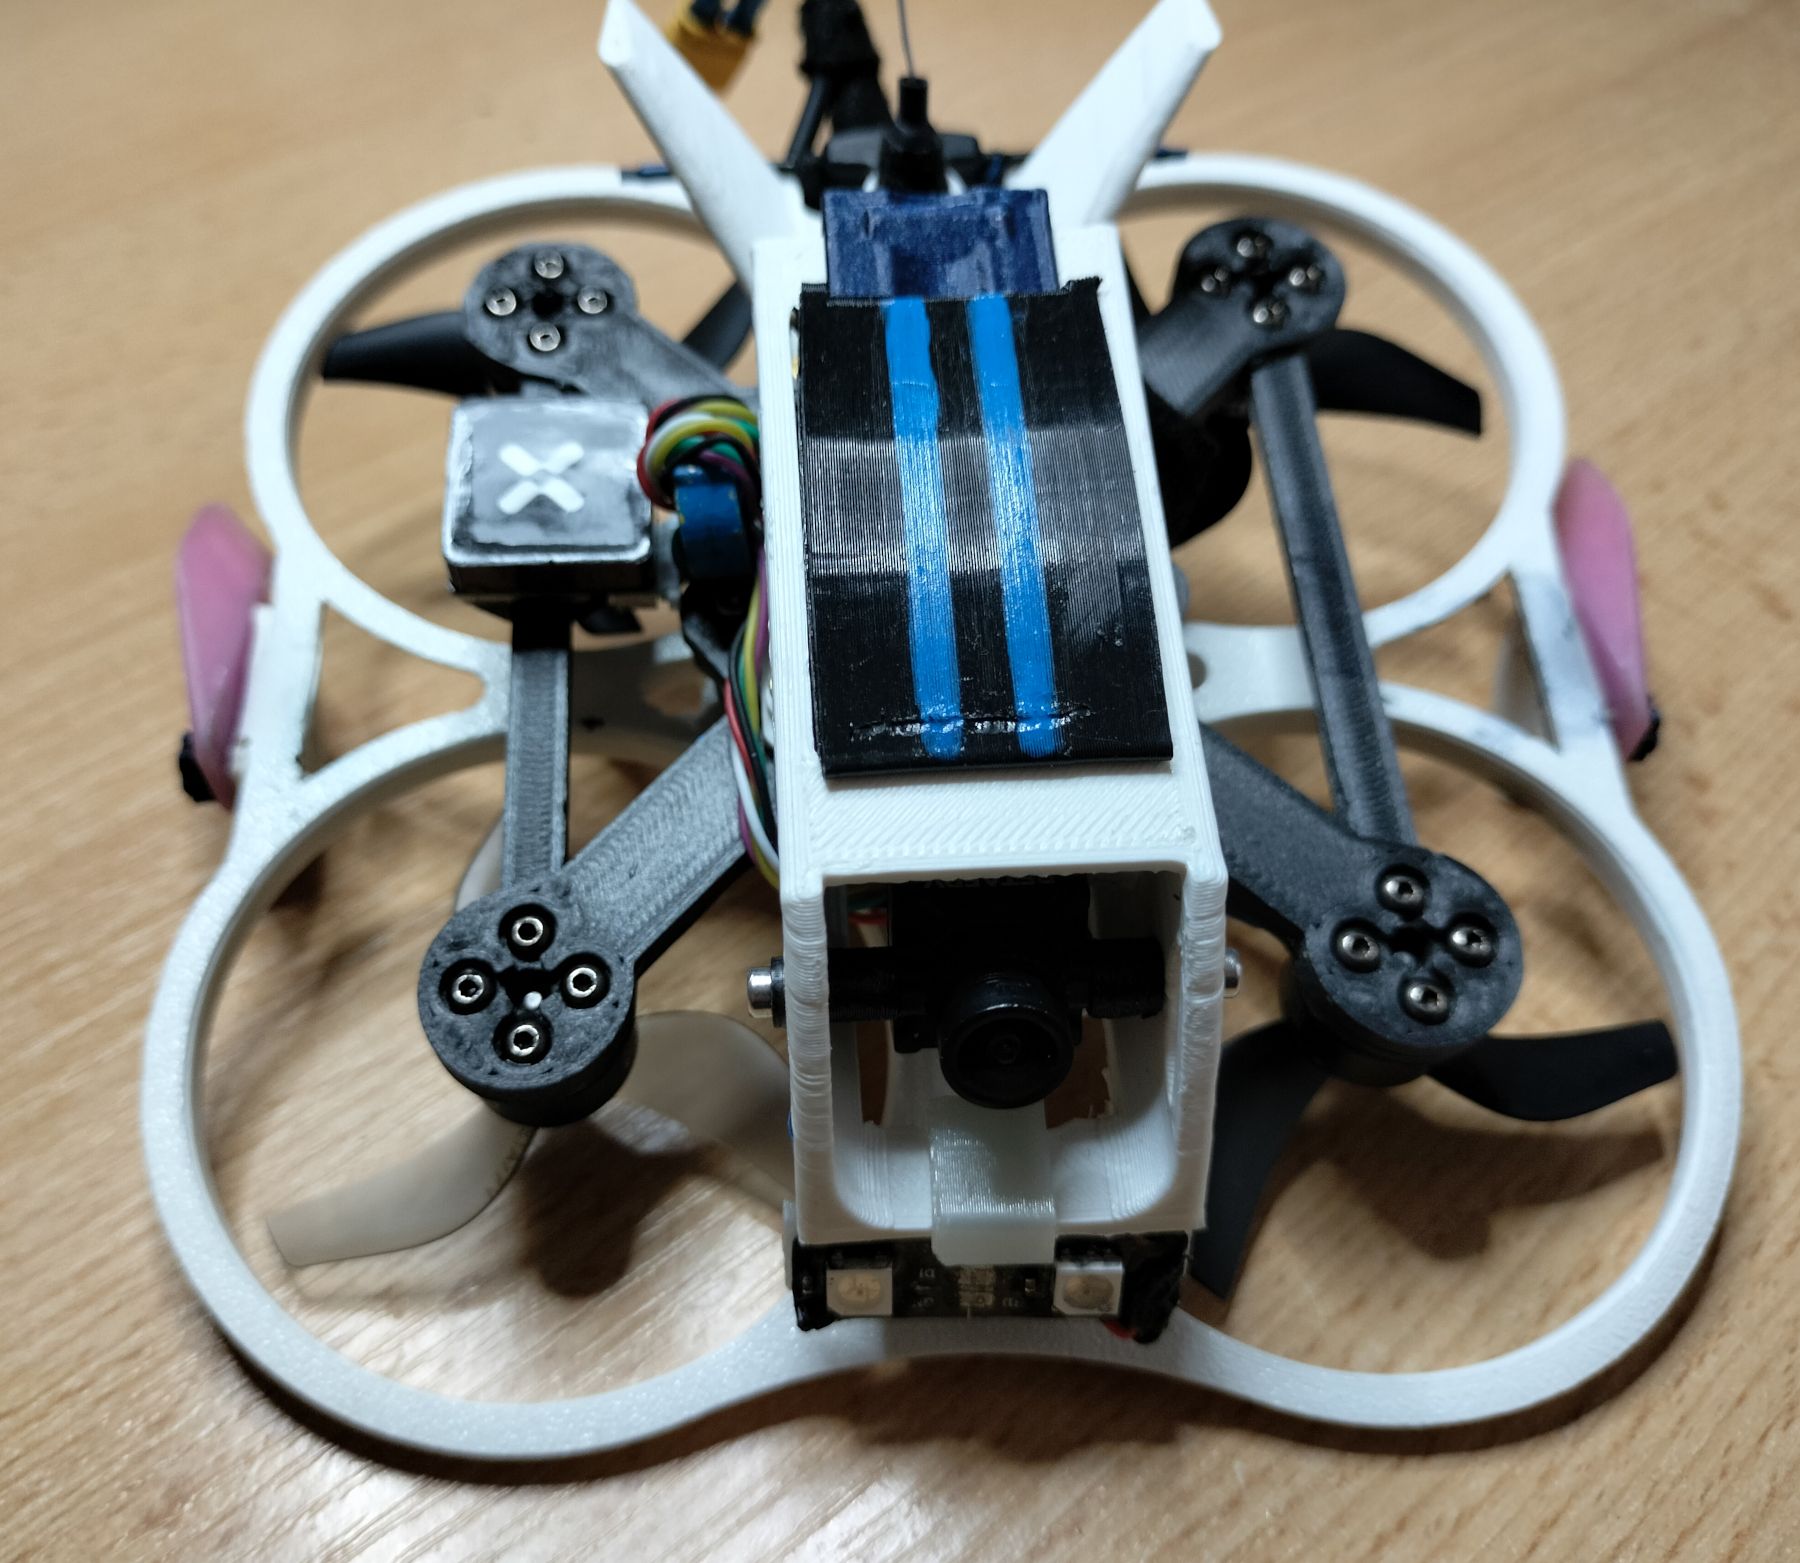
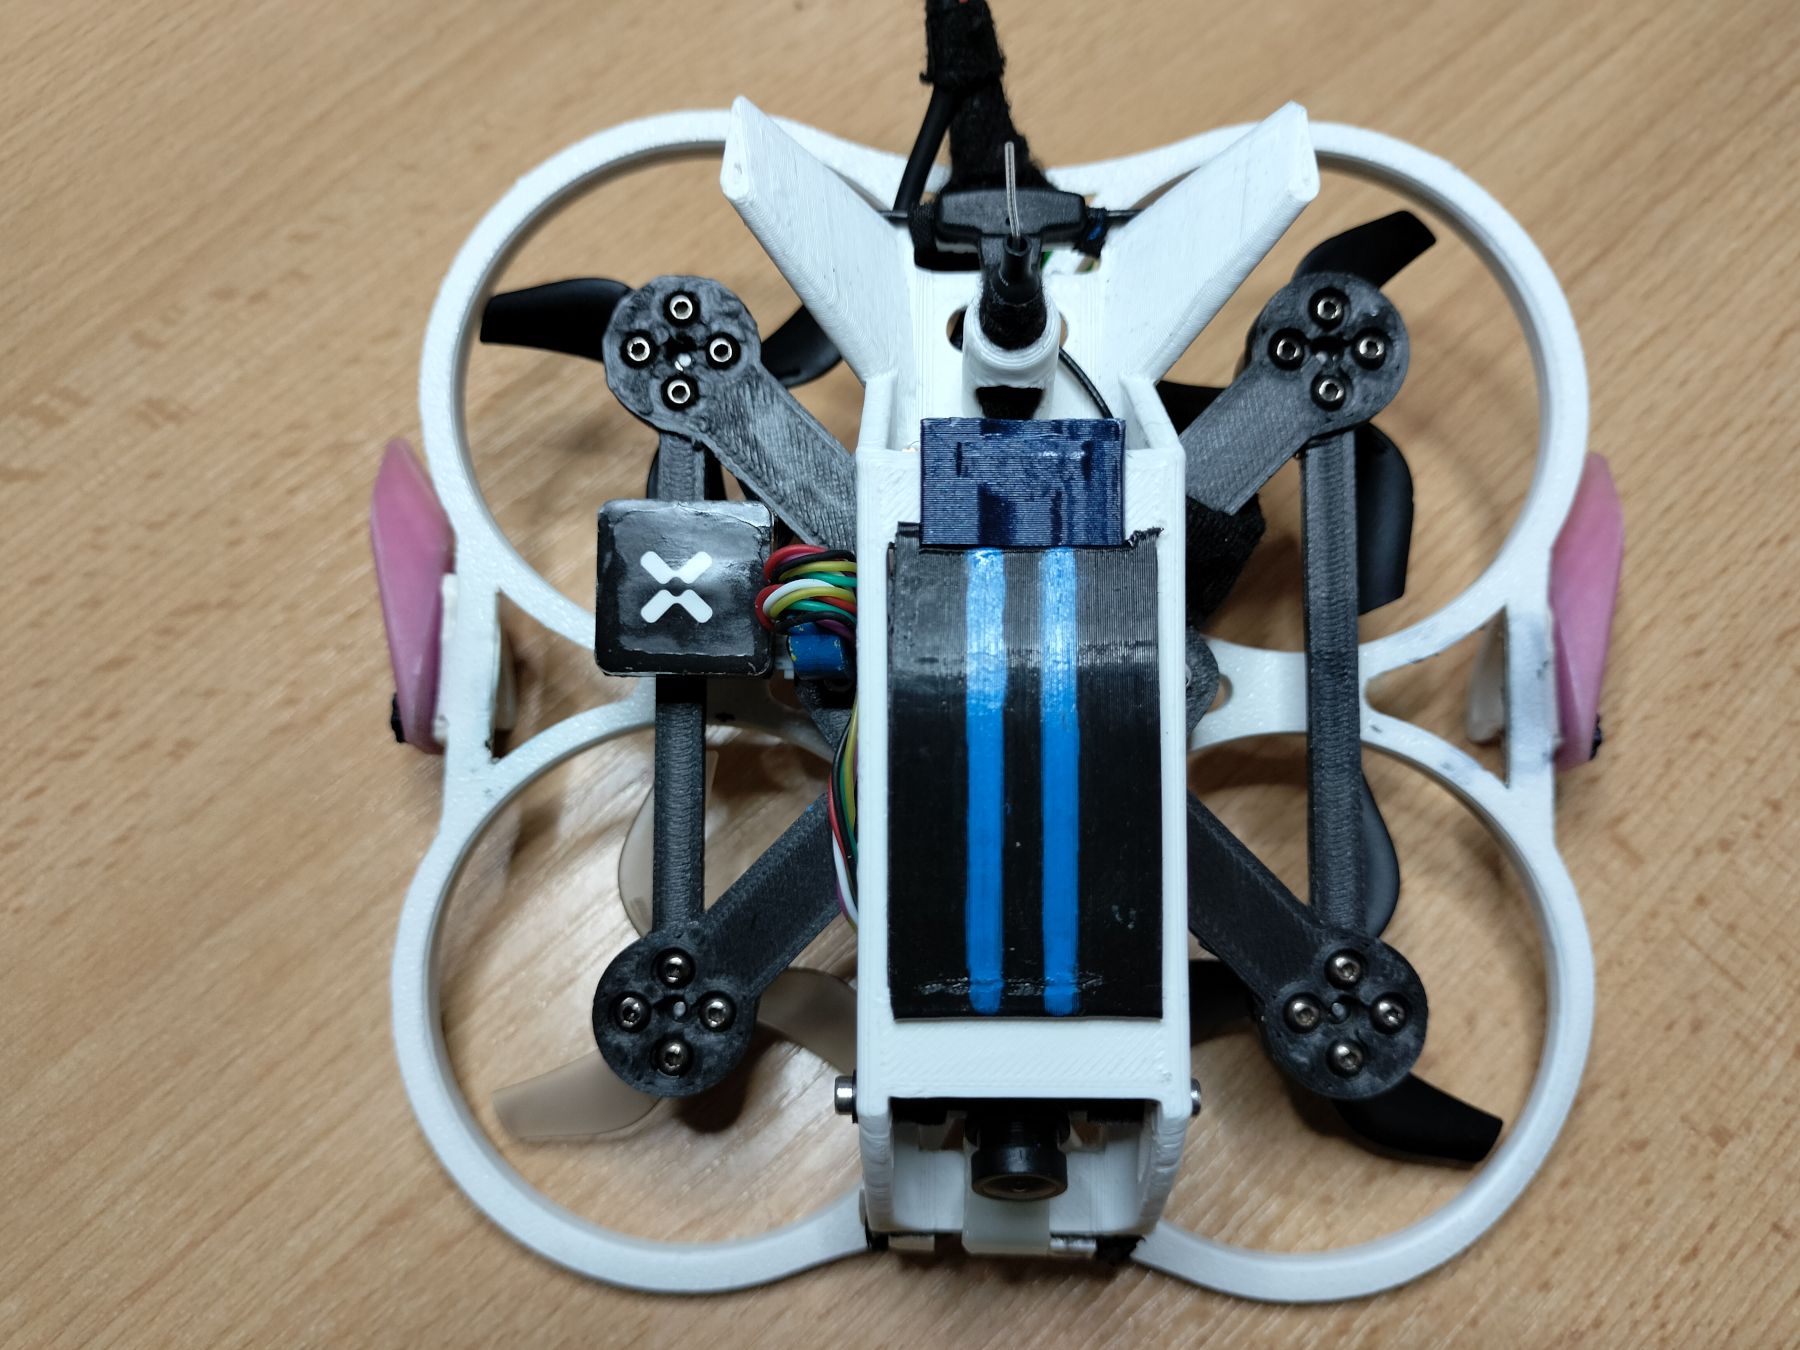
Chimera is 2,2" freestyle cinewhoop type drone, for 3S batteries, with fully 3D printed construction
Chimera are able to carry light action camera, like osmo nano or insta360 go 3S
Weights:
~170-180g with analog / P1 video
~220-230g with analog / P1 video and small action cam with mount
It's not cheap project- don't do it because of lack of funds. Buying a ready frame will be cheaper than buying CF filaments
one battery for one 2-3 minutes flight. Make sure you have more than 1
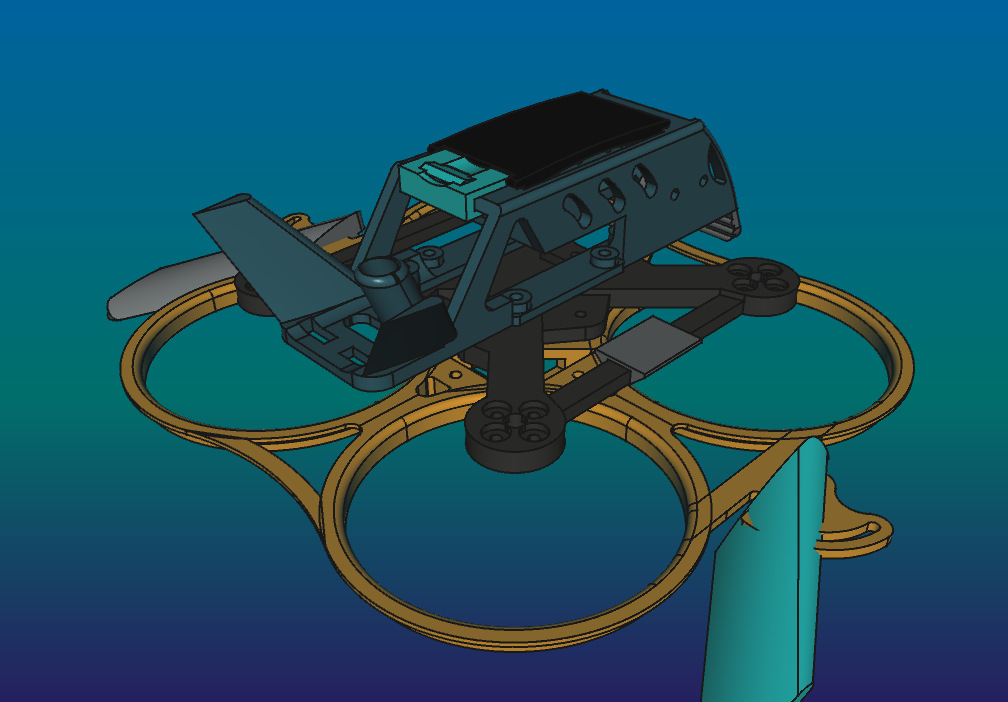
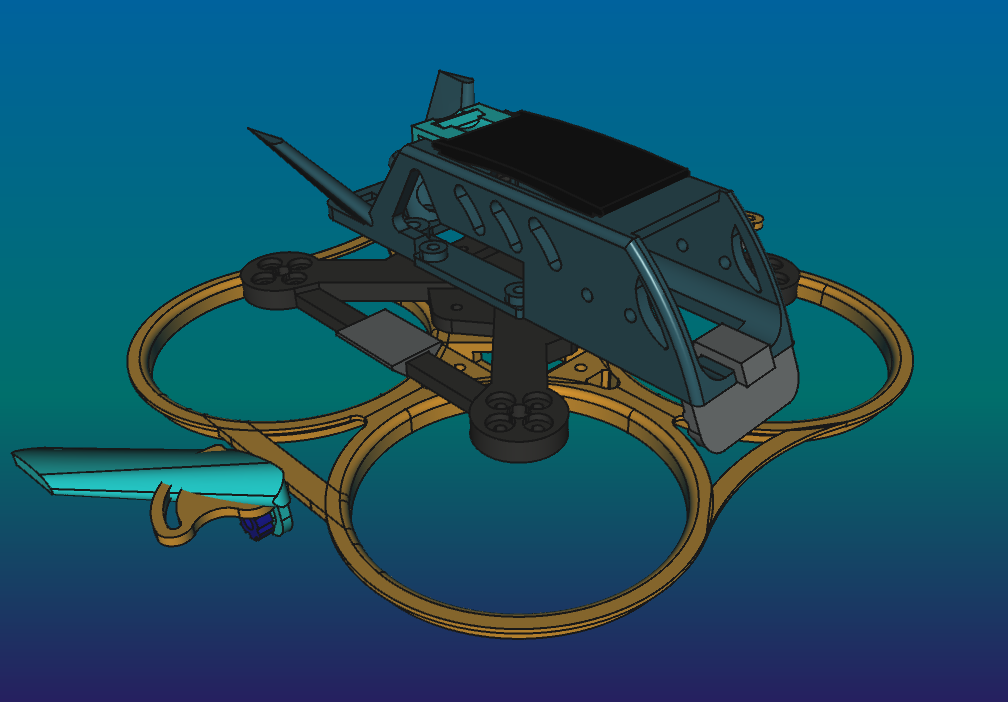
parts
- ducts-RL PA12, 3 wall loops, tree supports(add exception for strap channel), 10-30% honeycomb infill, rotate 180deg in X axis(upside down). after print heat and bend down the wing trims by 90 degrees
- frame PC-CF, 2 wall loops, no supports, 100% grid infill, rotate 35deg in Z axis
-
body
PETG-CF, 3 wall loops, tree strong supports, 100% grid infill or PA12, 2 wall loops, tree supports, 15% honeycomb infill
>remove supports under side vent pockets, camera axis holes, right tail vent pocket, VTX ant cable hole - wings PLA GLOW, 3 wall loops, 80%, no supports, rotate 90deg in Y axis, to make sure base is parallel to table
- cable mounts TPU A95, 100%, 3 wall loops, X90 deg, Y-45deg
-
roof/mount roof
TPU A95, 100%, 3 wall loops, Y90 deg, tree support
>set top support interface spacing 0.2mm to get nice look - GNSS mount TPU A95, 3 wal loops, X90 deg
- Grip nuts, sleeves PETG, 100%
- cable lock PETG, 100%, X90 deg
3D printed
- 1 x ducts-RL
- 1 x body
- 1 x FDM frame
- 1 x left wing
- 1 x right wing
- 4 x cable mount
- 1 x roof or mount roof
- 1 x GNSS mount
- 1 x cable lock
- 4 x camera sleeves
- 4 x FC sleeves 2mm
- 4 x FC sleeves 3mm
- 4 x grip nuts
electronic
-
[ ] FC
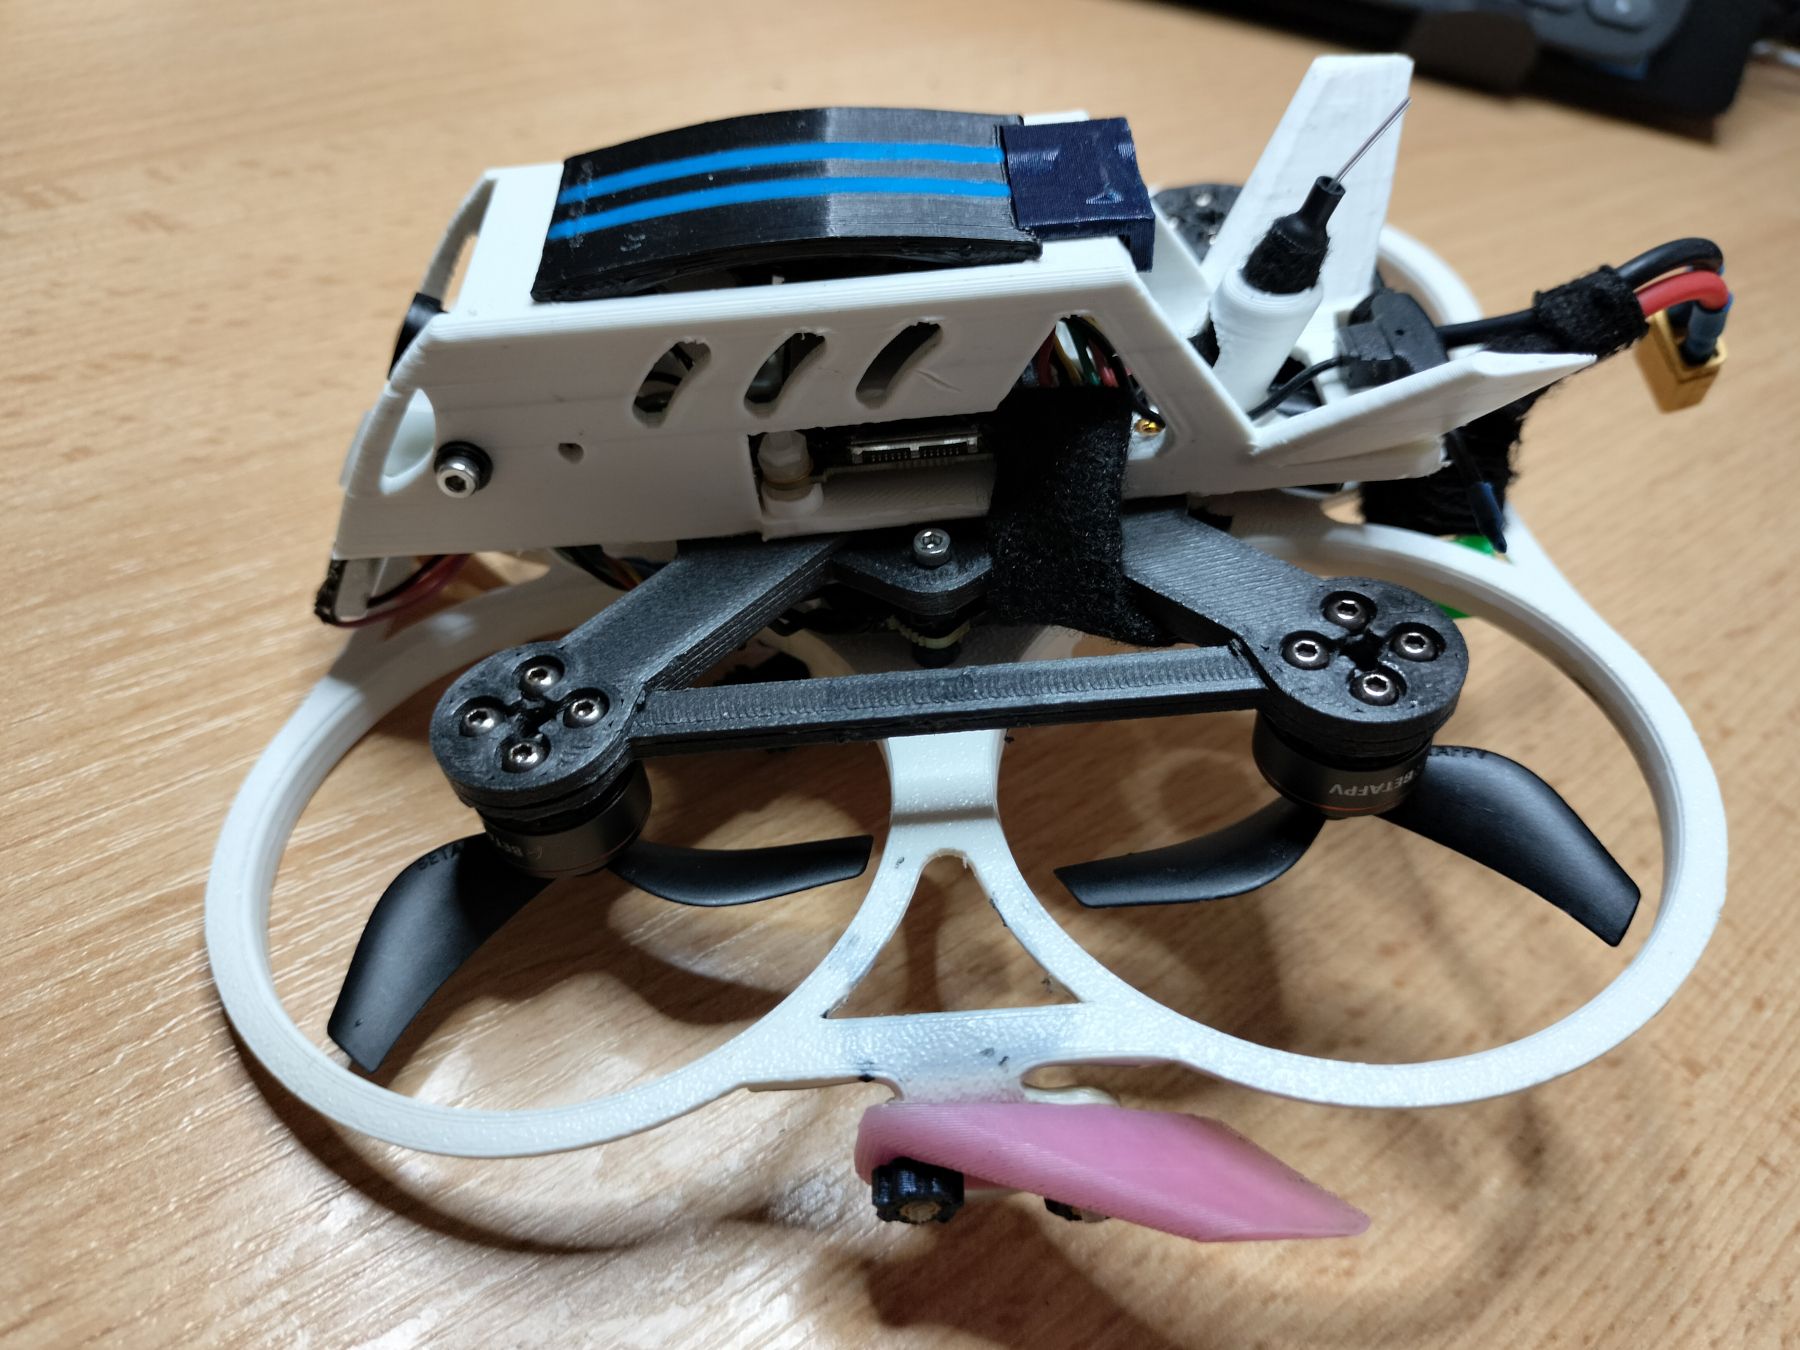
GEPRC TAKER G4 35A AIO
>you can use any other 20A+, compatible with 3S and 25,5mm pitch - [ ] propellers GEMFAN 2218 3-blade Propellers (1.5mm shaft)
- [ ] motors BETAFPV Lava series 1104 | 7200KV Brushless Motors
-
[ ] receiver
SpeedyBee Nano 2.4G ExpressLRS ELRS Receiver
>or any other ELRS receiver which can fit into modules mounts in body - [ ] camera Foxeer Cat 3 Micro(19x19mm) or other analog camera(set for PAL)
- [ ] VTX Foxeer Reaper Nano V2 VTx 5.8G 72CH 350mW Tramp
- [ ] Video antenna Speedy Bee 5.8 GHz Antenna V2 UFL
- [ ] battery LAVA 3S 550mAh 75C
- [ ] GNSS Foxeer M10Q-180 compass- mount on right fame spoke, faced antenna up and socket left(to body)
- [ ] Controller Jumper Bumblebee, or any other with ELRS and edgeTX
- [ ] Goggles BETAFPV VR03 or any other analog goggles
- [ ] VRX antenna Any RHCP antenna
- [ ] Charger iMax B6 V2 with some 12V supplier / ToolkitRC Q4AC
- [ ] 5A car fuse and cable socket charging fuse
- [ ] 2x RGB LED if you want make night flies
- [ ] 2 x additional XT30 connectors set to connect battery to charger and FC
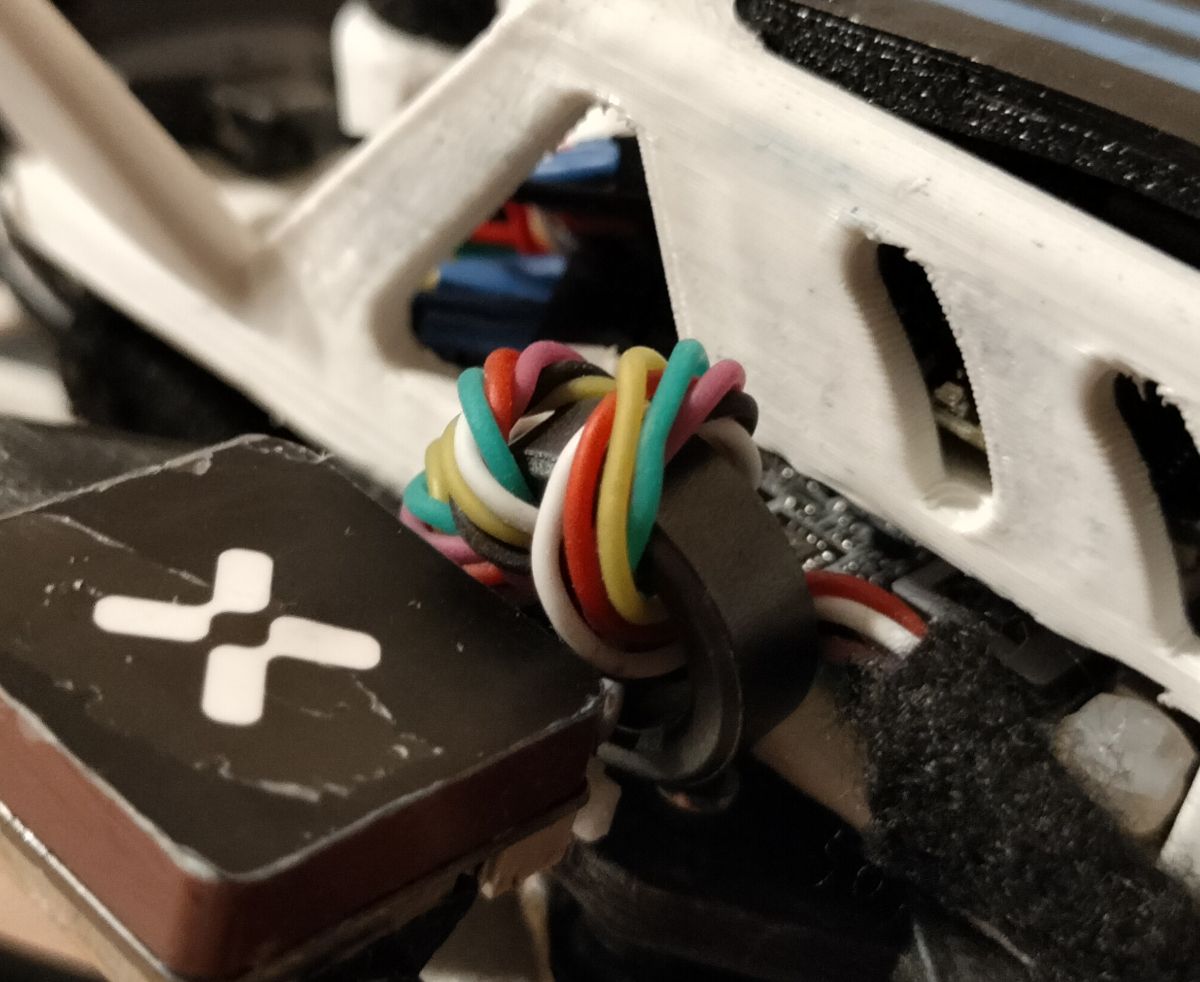
- [ ] red and black 18AWG silicon wire cables to make connection with FC
- [ ] 25-30A car fuse and cable socket not necessary, but recommended
- [ ] L7805 linear stabilizer + 2x100nF MLCC capacitor supply GNSS module from stabilizer instead of 5V from BEC
- [ ] aluminium foil and polyimide tape optional-for shielding GNSS cable and VTX
- [ ] 14x9x5 (diameter hole height) ferrite ring turn 3-4x GNSS cable as close as possible to GNSS module, and behind the linear stabilizer
mechanical
- [ ] 1x 10x130mm battery velcro strap
- [ ] 8x 20mm M2 screws with barrel head for stack mount, and wing mount
make sure you have spares- these screws can bend after hard landing :joy:
- [ ] 4x 10mm M2 screws with barrel head for body mount
- [ ] 12x M2 H3 D3.6mm brass insert
you can recover it from broken parts, but make sure you have spares
- [ ] 4x M2 1,6mm nut to lock stack screws
- [ ] 4x M2 20mm PA screws to mount digital VTX
- [ ] 4x M2 0,8mm nut to screw in digital VTX
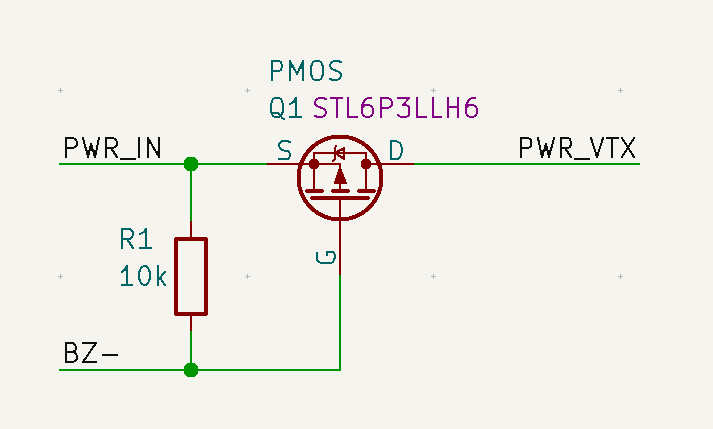
project contains configuration for HD version with BZ- pin used as VTX power switch.
firmwareIf you are building remotely:
choose analog OSD Protocol and type OSD_HD in custom defines, to build firmware with both- digital and analog OSD
In other options add Magnetometers, Position Hold and Altitude Hold
BD1 stands for "Bart's Design 1"
Source: RotorBuilds.comGalerija


Komentarai
Komentarų dar nėra. Būkite pirmas!